|
|
Post by spud on Apr 13, 2022 8:47:24 GMT -8
Ok so i sent reb some picks of some stock 304 heads. Whats gonna happen is i’m gonna install 305 chevy valves and mofify the ports some . Then i’m gonna put them on my car and see if they do anything for a stock low compression 304. Should be an interesting waste of time! Sorry to hassle you reb but its gonna be a team effort. Should be as much fun as the headers by spud thread.
|
|
|
|
Post by landbarge on Apr 13, 2022 9:31:26 GMT -8
Cant hurt anything.
|
|
|
|
Post by Captain Awesome on Apr 13, 2022 11:12:35 GMT -8
A agree with LB, you got nothing to lose, and only gain some knowledge and facts about it.
|
|
|
|
Post by spud on Apr 13, 2022 12:05:19 GMT -8
I wish i could keep the 30 degree intake seat. Thats something to lose. The stock 304 is nearly identical in flow to pre vortec 305 chevy heads. The 1.797/1.406 amc combo works as good as the 1.84/1.50 chevy head. I wanna try to cut some old chevy valves to a 30 degree seat angle to see it the valve would take the angle without thinning it too much. The 30 degree angle provides much better flow below . 400 lift. And the stock cam only lifts to .430 inch , so a 45 degree seat will actually fuck a good thing up, in using a stock cam. Of course you cant have your cake and eat it too, and a 45 degree seat really shines after .400 lift, so you really gotta pick your poison when modifying heads. One thing to keep in mind is i dont want big flow numbers. I want to increase the overall efficiency of the heads so i’m not hogging them out for big numbers. The heads have been proven to flow around 170 intake and 120 exhaust at the .500 lift benchmark. 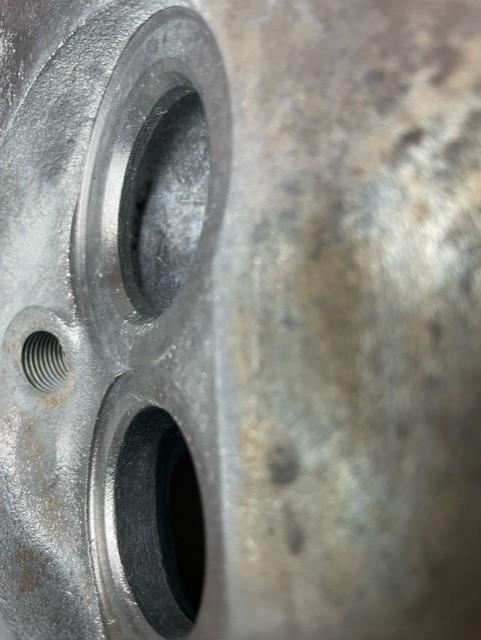 Focus of this pic looking across the chamber towards the plug is the super short transition from the intake port to the intake seat, that forms a rim or ledge around the intake bowl, and the short notch under the exhaust seat into the exhaust port. Keep in mind this lack of smooth transition in the bowl is not a huge problem at low lifts. But it really sucks with higher lift cams and screws things up in a big way with higher lifts, as well as the 30 degree seat on the intake. This is a fine low lift design is the main point , and a big reason why hotrod cams dont work so good in a 304… 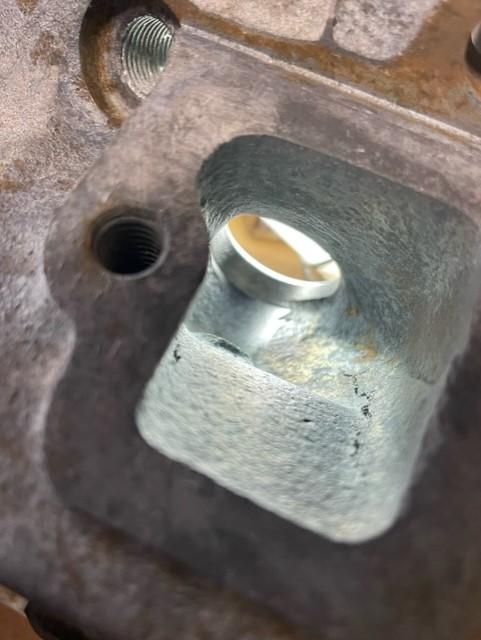 This one highlights the small ex valve opening into a large exhaust port. Inverse geometry . The opposite of conventional port form. Take a look at this port on a 517 head. Its probably the best shaped exhaust port in terms of trueness and squareness i have ever seen.  Good shot of the lack of short side radius on the intake  The ledge, choke point, main interuption in yhe long side radius of the intake 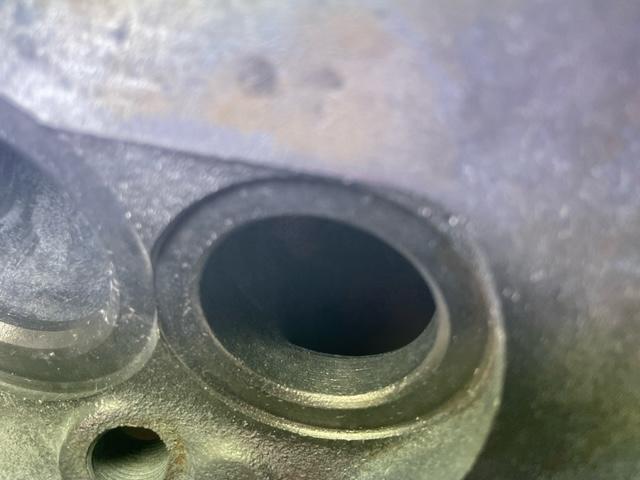 The exhaust port is a one angle deal, flat spot face in the chamber, a 45 degree seat, then 90 degrees into the port. I dont see air liking any of those abrupt transitions 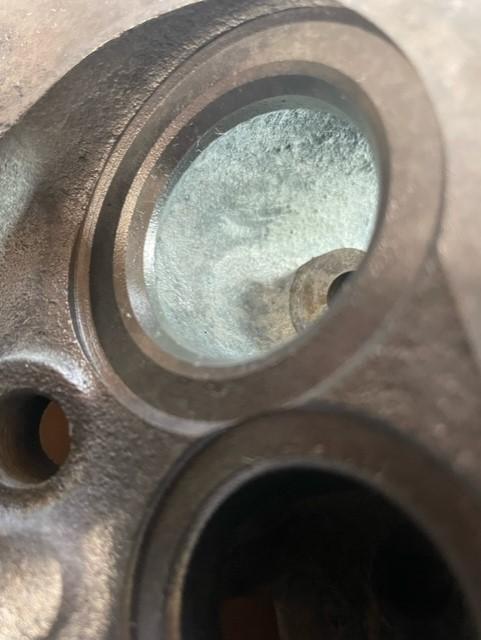 Another shot of the strangler intake bowl 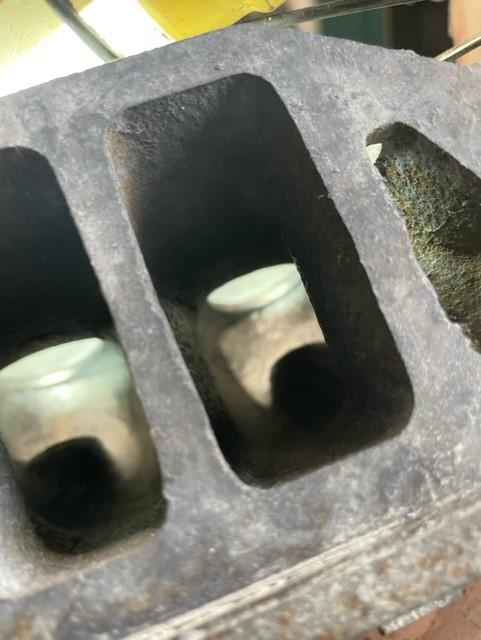 The intake port is identical in size and shape as any big valve head. You can see what it all squeezes through at the other end. 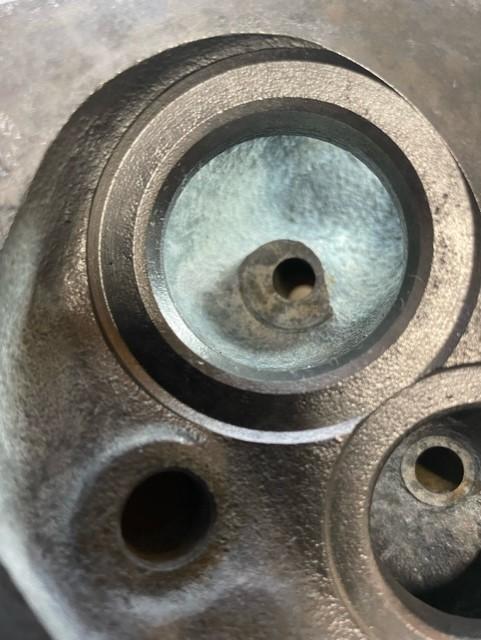 so thats what we have to work on. In simple terms this is amc’s solution to making it work. Just like many an amc engineering problem, its how to make a big head feed a small cylinder. There is really more port than needed, and enough valve to feed a utilitarian 304. It actually works well. So dont get me wrong it is an amazing design for its porpose, and a successfull compromise in making a head designed for a larger engine work. Actually its easy to make it a high performance head. Just cut the seats out for big valves. Basically the small valve and big valve heads are identical except for the seats. They just cut more out for big valve heads. I’m not sure why they used different casting numbers. The only drawback to that is the 304 has a small bore and big valves just arent what it needs. Truth is if this particular pair of heads would have not had a butchered exhaust seat i was gonna just do a little bowl work and a little port detail here and there and a better valve seat cut and hope for the best. But the butchered seat was a dealbreaker. So on on to the chevy valves. Bigger valves will allow me to cut out a lot of the notchiness in the bowls and develop more transitional radius to the short sides, cut out the ledges at the long sides, creat a four or five angled seat, basically not do anything else to the intake ports, the exhaust will get about 3/4 port job with the problem bumps cut out. I’m not gonna do a dog and pony fully portrd head. Just going to do what i’m confident won’t hurt. Its just a 304 turning 4500 rpm so why get carried away. I believe the 304 heads are basically oversized ports with undersized valves, and with my basically stock engine i would honestly want to fill up some of the intake port. I dont think i will do that at this point, but i really expect there would be gains in that strategy. I think filling the entrance of the intake, then matching it to the smaller sizing of the edelbrock intake, would make for real gains in port velocity and response. I’m not feeling that energetic at this moment. |
|
|
|
Post by landbarge on Apr 14, 2022 9:30:43 GMT -8
Done yet?
|
|
|
|
Post by sc397 on Apr 14, 2022 11:19:20 GMT -8
I want them back when you are done.
|
|
|
|
Post by sc397 on Apr 14, 2022 11:26:30 GMT -8
Hey Reb, you should put this thread in the Engine threads.
Too bad we couldn't list all of out 304 stuff in one section somehow.
I know, quit thinking out loud Rick..
|
|
|
|
Post by 69Rebel on Apr 14, 2022 11:58:51 GMT -8
Not a bad idea.
|
|
|
|
Post by spud on Apr 16, 2022 17:43:20 GMT -8
I started this morning and finished about sundown. I finished with about 90 percent of it. The last bowl blending will happen after the new chevy sized seats are cut in. I did the exhaust ports only. You will notice i didnt cut anything off the floor of the ports. The idea is to leave it alone so it fills back up with carbon to keep the floor high. I am going to do only the bowls of the intakes. I figure stock intake ports will deliver enough air for 500 hp. They are already too big for what i need why bother with porting them. I will leave them rough on porpose. Because i may fill them up with epoxy in the future and i want all that nice rough finish for the epoxy to cling to. 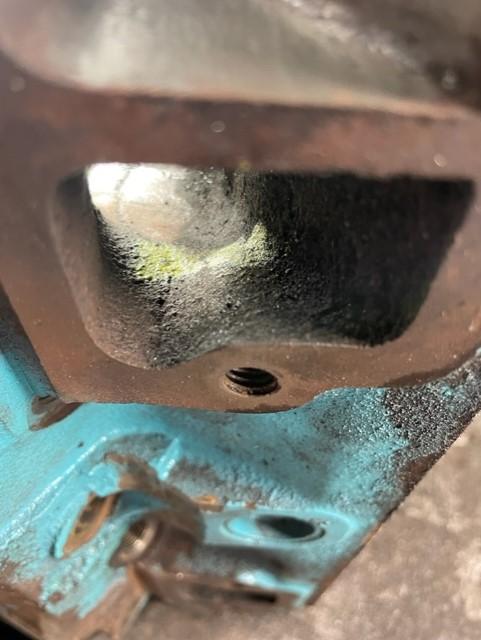 I tried to highlight the two most offensive areas in the port, the bump into the dogleg and the bump in the transition in the roof from the bowl to the exit, with yellow paint. This two areas get the most reshaping  Same thing different angle and light 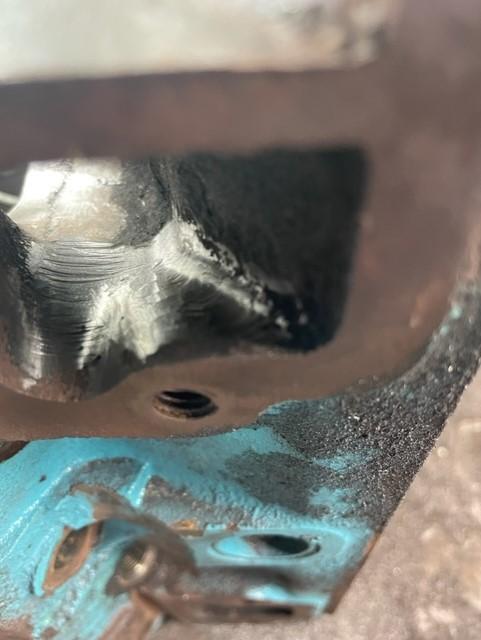 First work with aggressive burr 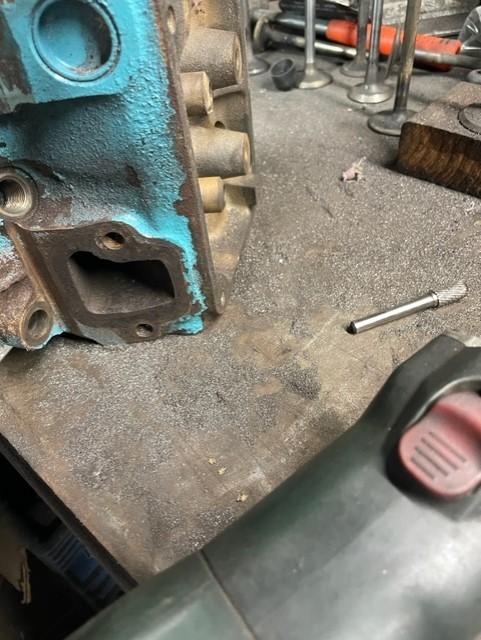 Random pic of burr  More with less agressive burr 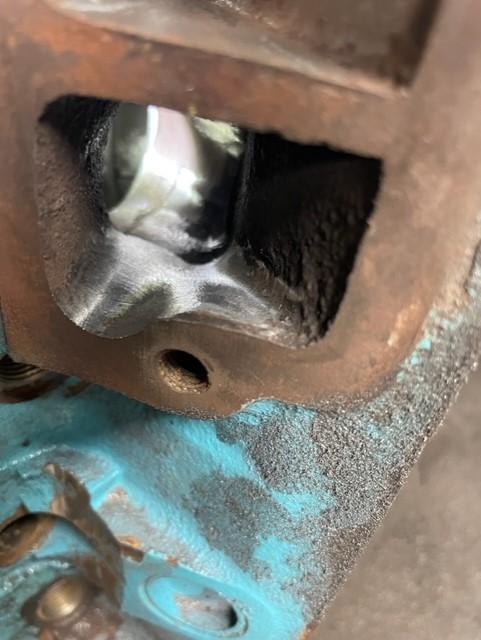 More work 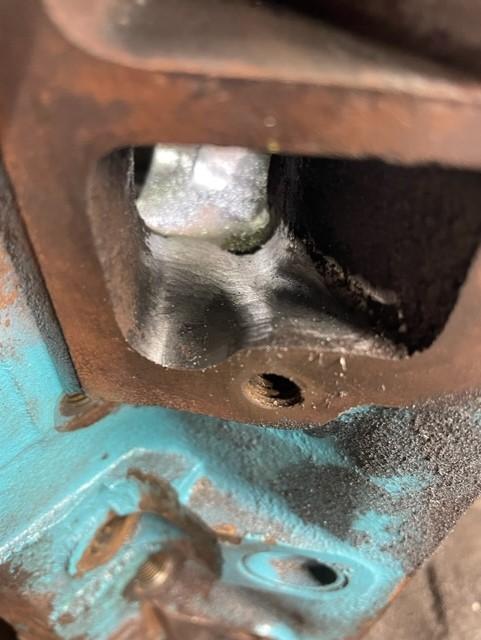 More work 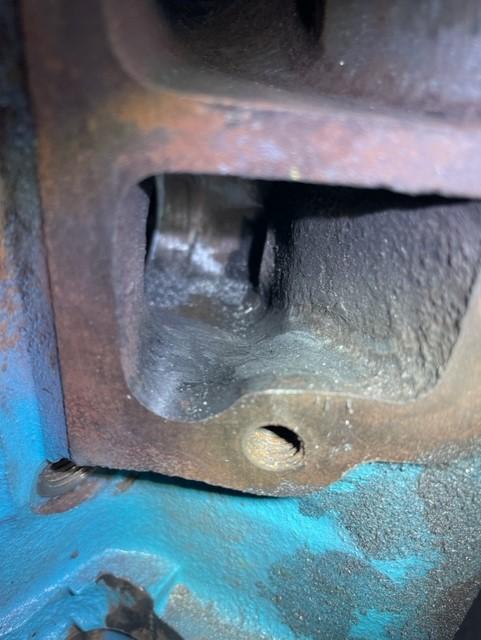 Different lighting  Millions of sharp pointed iron shards  Thats close enough for now 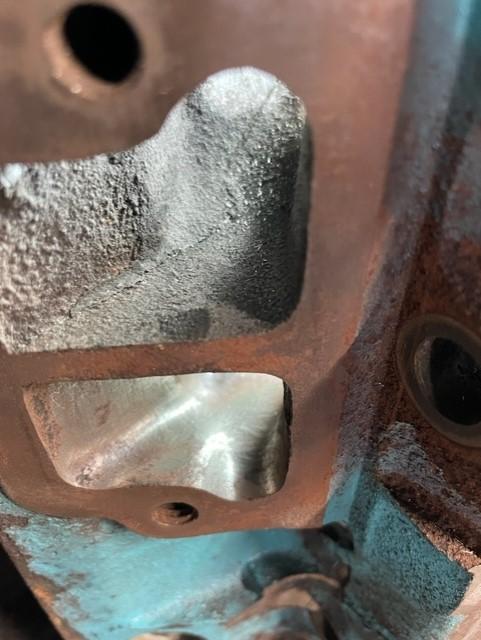 This is the outside wall opposite the dogleg. Just gonna flatten it and work on the transistion to the bowl a little 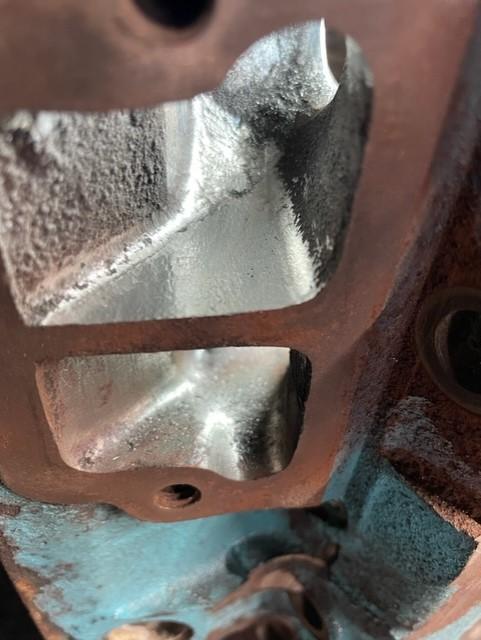 Thats enough for a rough shape. 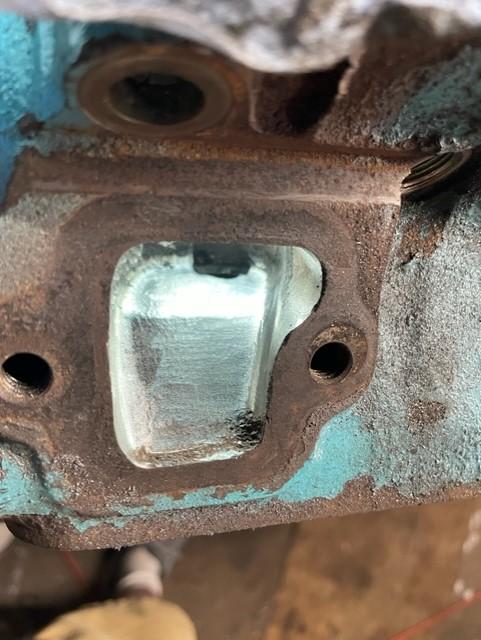 I didnt get a pic of the roof before i started , but here’s a pic of the roof roughly shapped. I leave the transition angle from the bowl to the exit in the roof. Some people blend it out. The iton is not thick here and its easy to get carried away. I have also read that cutting out this feature is a mistake and hurts the port, so i leave the amc engineering alone 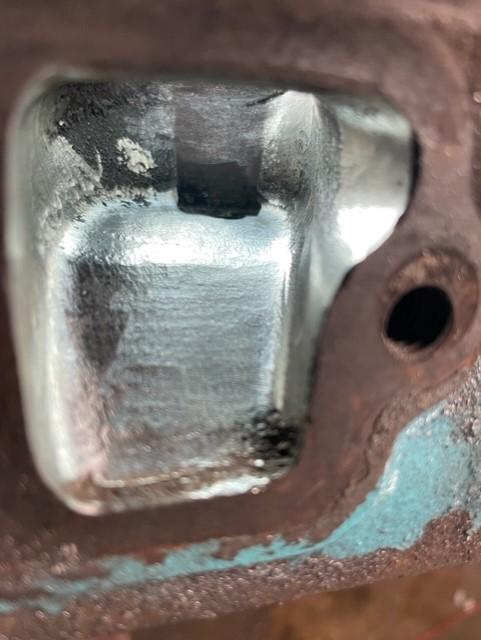 Closer veiw of same, highlighting the factory machined in funnel shape, from seat to valve guide area, with will be blended in working through the seat hole. This machined area is very inconsistant port to port. Some have a lot, some just a little, it highlights inconsistencies in as cast port shape, and is an indicator in itself of how much to smooth out around it 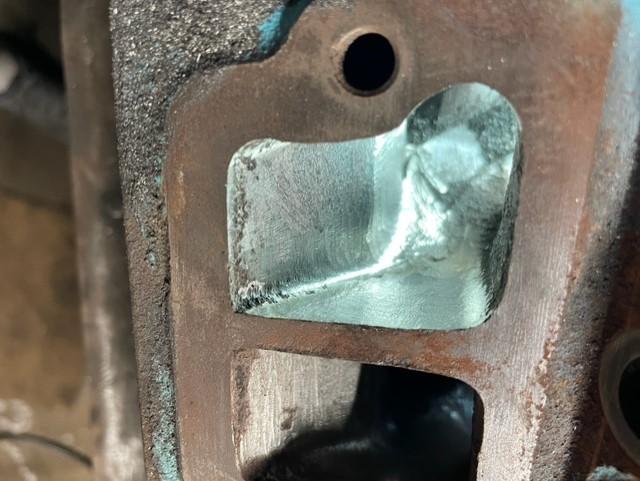 General veiw of finish rough cut port 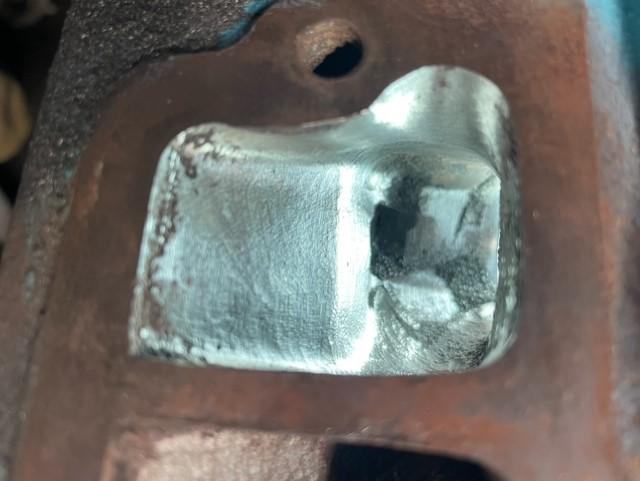 General veiw 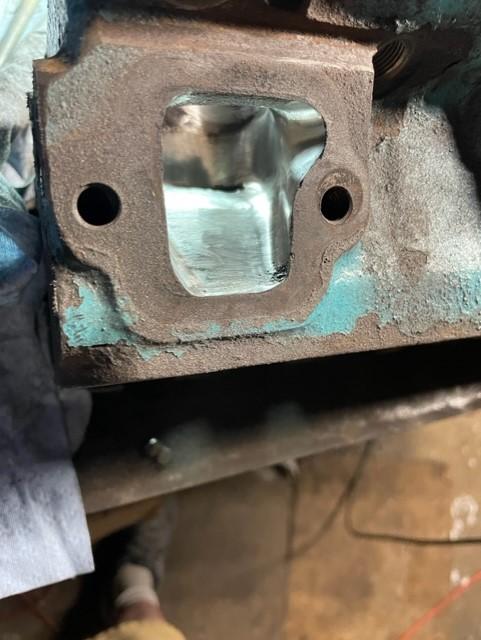 Moving on to finishing shapes with a abrasive sandpaper roll 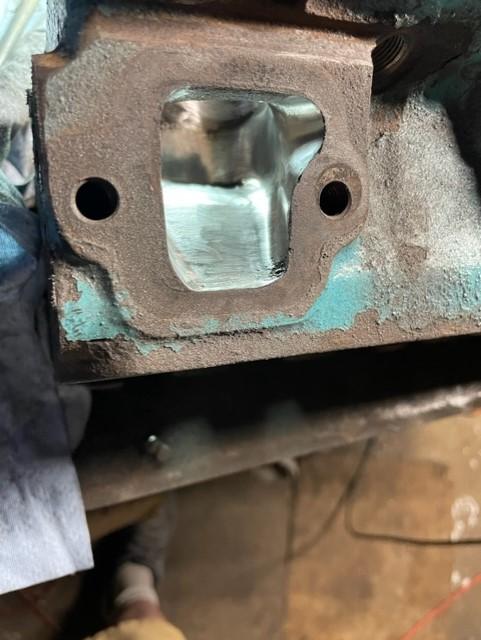 More of same. Making iron dust now. Done flinging tiny iron toothpicks 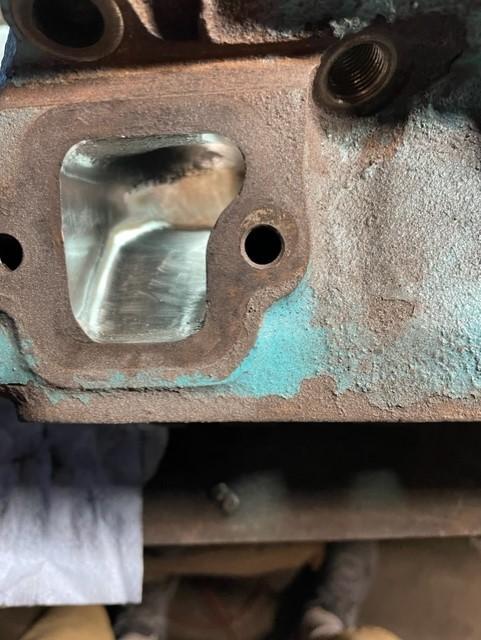 Veiw of outside wall during abrasive shaping 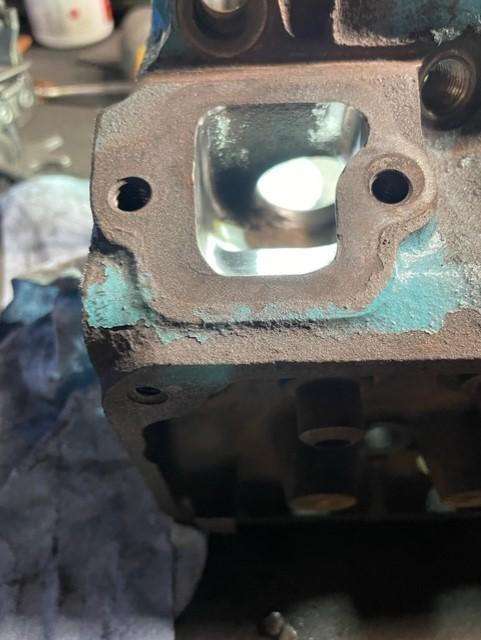 General veiw, note untouched floor 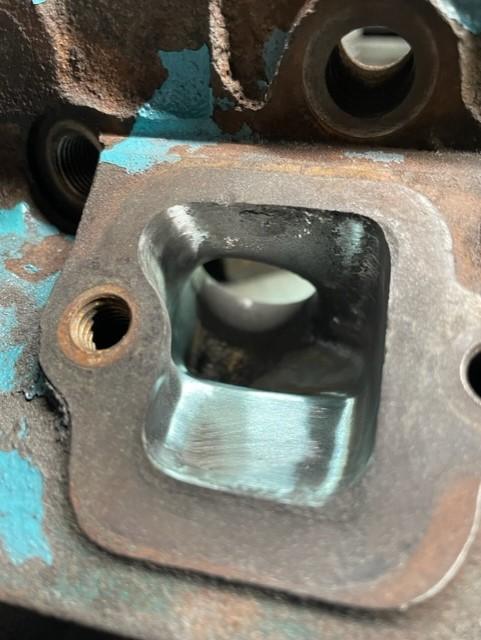 Same deal after more abrasive work 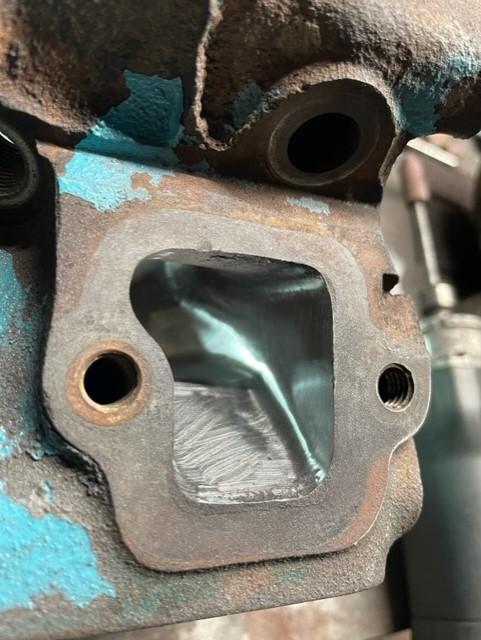 Veiw of finished shape  Another veiw  Veiw of port shape compared to gasket, point is to show that port is stll nearly factory size and shape. The outside wall is straighter and slighly bigger, the opposite dogleg side is the same, the floor is untouched and the roof exit point is unchanged. Concept is the port exit is not enlarged, bellmouthed or anything. I see a lot of heads where the porter gets carried away here and attempts to make it look big by bellmouthing the hell out of it. I’ not going to ruin the exit into my headers. I left this alone and it is actually smaller than my header inlets. How i know this is this is the same gasket i use to shape my headers. And my headers are pretty much exactly the shape of these gaskets. They are mr gasket ultraseal, i dont use them for gaskets, i only use them for a template. So i’m about done porting these heads for now, off to david schreiver at wells racing to put in valveguides and cut the valveseats for 305 chevy valves, then i will finish blending the new bigger seats into the bowls. So thats about a days worth of porting on both heads. The intakes are not getting anything othrt than slightly bigger seats and a blend in. Everything i’m doing is based on theory and i am not making any big modifications or changes. In yhe end it might not help my stock cam tune at all. Its all experimentation honestly. The unmodded heads may very well be fine for the stock 304. Modified heads generally make a more profound increase in modified engines seeking higher rpms and airflow. We will see what they do. So to summarize this section, i cut out two well known obstacles , smoothed out high flow areas slightly, tried to keep things consistant , did not touch the convex floor to retain a high port, did not enlarge anything ( much) because its a small engine that is very reliant on low enf power and torque. I am opening the door a little more for a higher rpm power curve, without ruining my low rpm response. ( in theory) |
|
|
|
Post by spud on Apr 23, 2022 19:28:49 GMT -8
And so it goes, i elected to upgrade on valves, opted for manley’s race flow stainless 1.50 chevy exhaust, stock 4.911 length, and the manley race flow 1.84 intake, stock 4.911 length. These are really nice valves and were not cheap. They are profiled with undercut stems and swirl polished, for lighter weight and smooth profile to the seat angle. They should be good for a little more of what we are looking for. The heads will get new bronze guides, five angle intake seats, four angle exhaust seats, the guides will be cut for positive oil seals, the springseats will not be changed because i am using a single spring with flat damper. Dropped the works off at the machine shop this morning. They are really busy so i might be waiting a while. I did get a pic of the exhaust valves when they showed up. Forgot to get a pic of the intakes. When ups showed up with them, i rushed it all over to the machine shop before they closed. But anyways i sent reb a few pics of the exhaust valve. The intake looks the same only bigger. 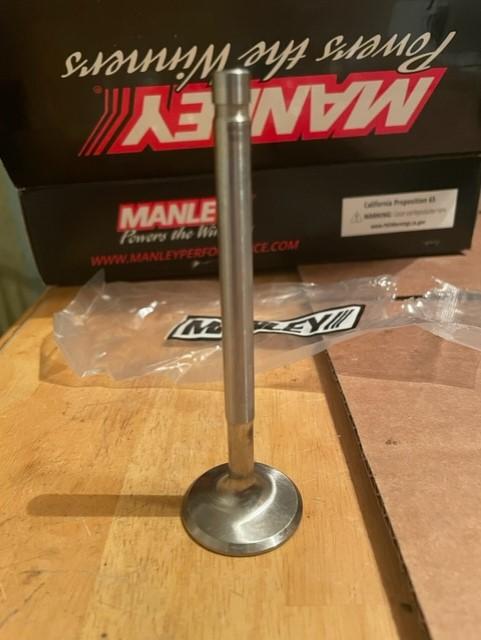 In my opinion manley valves are true performance porn. 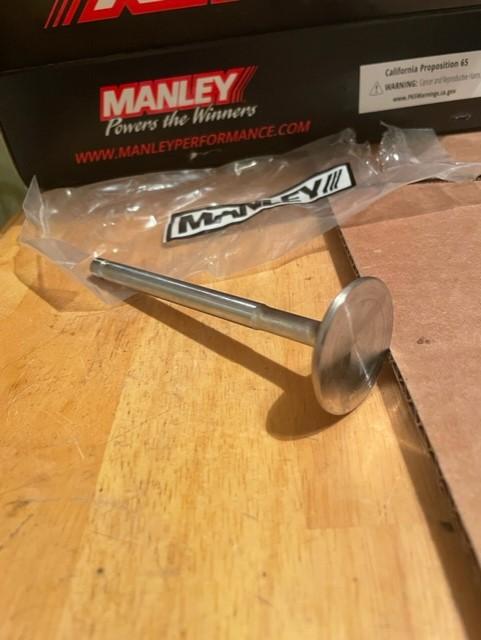 Dished head valves… less compression. Boohoo. Less that low compression? Yup. 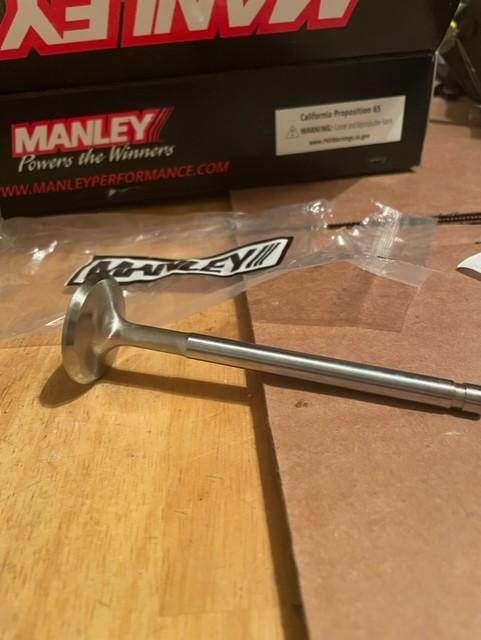 Thats another 350 bux i coulda spent on something else i know. Is it overkill for my 304? Maybe with the stock cam. I guess you know its less factory all the time aint it? And we all know i’m not going to have a stock cam forever right? |
|
|
|
Post by spud on May 15, 2022 21:05:37 GMT -8
If you want to get into the real science of cylinder head mods, i highly suggest david vizard’s powertec 10 series of videos on youtube. He has a series called the 5 golden rules of head porting, and numerous other videos on the subject. If you have any interest in cylinder head work these are must see videos. 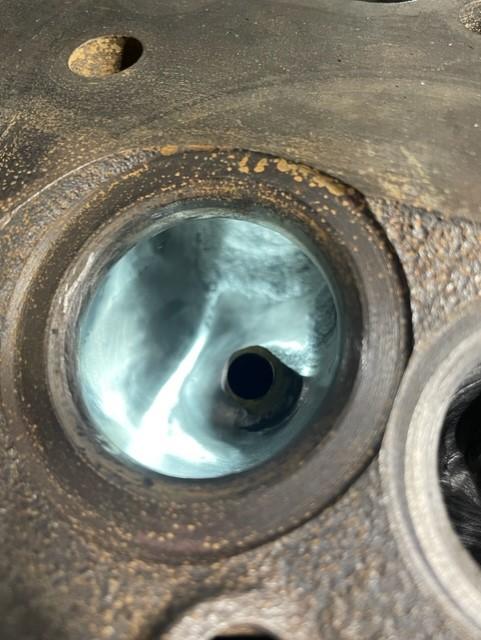 Thats the finished intake bowl. The biggest change is the work on the left side of the guide boss, opening up the “trough” on the side of the “ outside” wall, or the common wall, the wall that is sharing the divider between the other port. Most of the high velocity flow is along this wall. Opposite the “inside wall” or the wall that has the pushrod “ pinch” in it, which has low velocity flow. The work i did narrowing the valve guide boss and widening the trough area is theoretical, to encourage or allow the flow more room here, to keep it on the outside wall area, because the amc port is totally designed to do that. You will notice the guide boss is formed to do just that. Keep the flow concentrated to that side, so when it goes into the bowl and out the valve, it turns toward the spark plug. Its a natural shape to create the flow to turn towards the sparkplug, created the swirl effect into the cylinder. I didnt do anything to the other areas of the valveguide boss, as i want it to “ be in the way” to keep the cast in swirl effect…If you aim a water hose into the port and aim in at the outside wall side of the bowl (with no valve in the head of course) you will see this dramatic swirling effect. The amc intake port generates great swirl effect. Once again i didnt take anything off the floor, and probably shouldnt have touched the inside wall at all, but did some anyway. You can compare shots of the untouched head to see the changes. Really porting the entire port is completely useless. The area i didnt touch has no problem passing 2.5-3 times more air than will ever get past the window of the open valve and seat. The small valve is by far the greatest restriction, as is the lip, or ledge formed at the long side right under the valve. Putting larger valves in allows me to do serious improvements here. Its by far the worst problem in the head as far as restricting intake flow. Your not going to see as much of this ledge when the new seats get cut in.  This veiw is sideways, but the port wall on the bottom of the pic is the outside wall, and has high flow, you can see as it approaches the valveguide boss, the boss is in the way of the inside wall( wall on top of pic) which creates a shape encouraging flow to the outside wall area of the bowl. Natural shape to push flow to the outside, and so it will focus flow to the outside of the bowl. 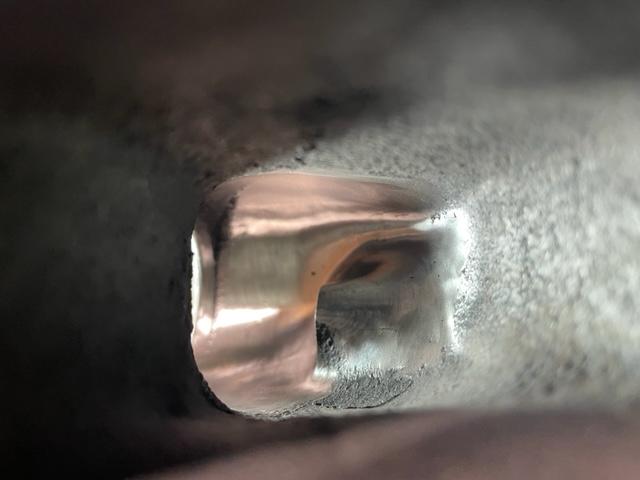 This is the opposite, the port is reversed. 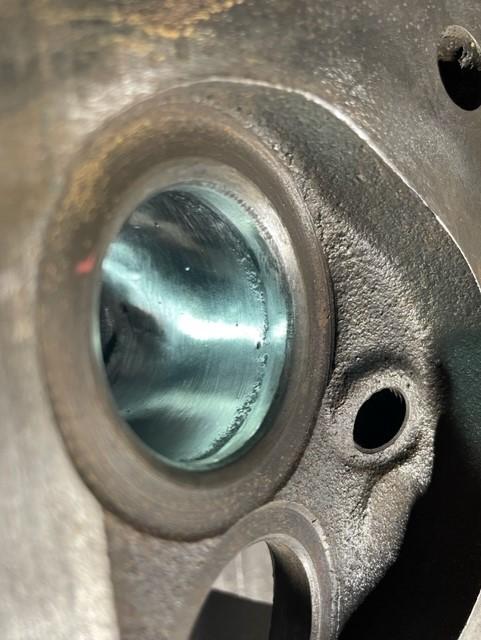 This is a straight on shot of the highest flow and velocity area of the port. The 90 degrees or so of the intake seat adjacent to the spark plug has by far the greatest amount of intake flow passing between it and the valve. And your getting a good veiw of “ before” the new larger seat cuts out the ledge. 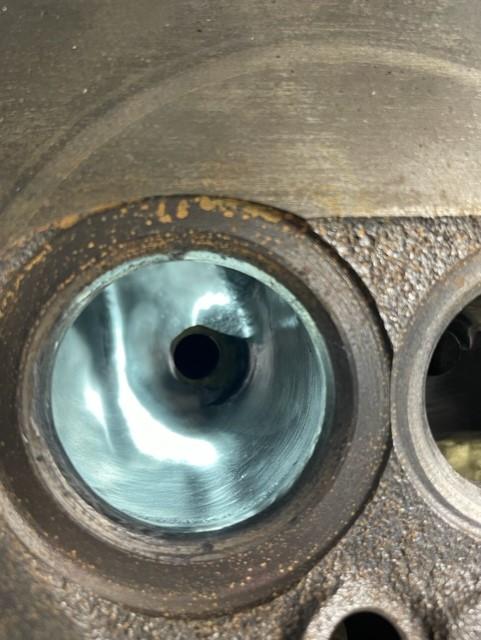 Another shot of the bowl showing the smooth blend i wanted on the longside of the turn to the seat. ( the area at the bottom of the port in the picture. This will get better with the new larger seat) notice how amc kept more port volume to the left of the valveguide ( outside wall) and much less volume on the inside wall( wall adjacent to exhaust port) this is good swirl port design. 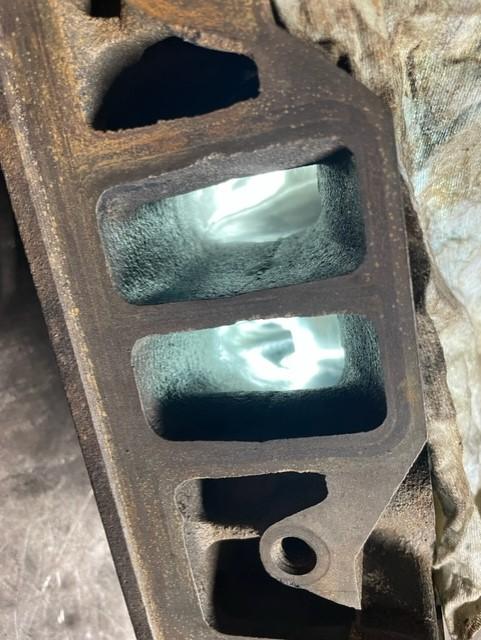 This veiw shows that i didnt do anything to the unrestricted areas of the large port. 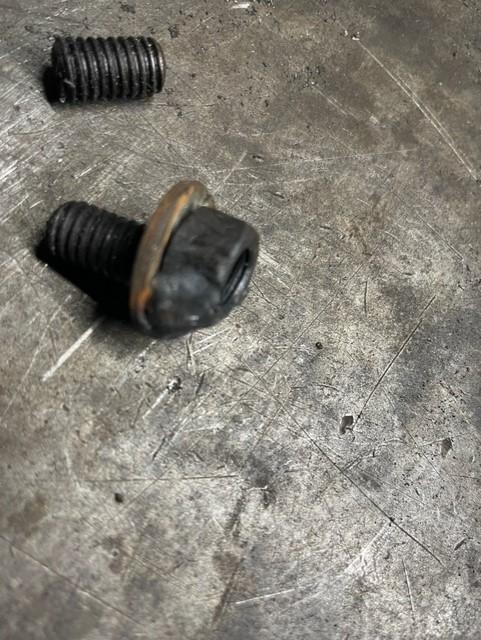 I had some broken exhaust manifold bolts i removed  If you watch some of david vizard’s vids you will see a computer program that analyzes predicted airflow through a port. I garantee it will open your eyes to how air behaves through any port, and it flows in a manner you will not expect, it doesnt turn at all , it doesnt flow along a port wall or any such stuff . It is focused into whatever areas it takes to flow in a straight line, and out the highflow area between the valve and the seat in line of sight from the intake manifold. Watch his vids and you will see that most head porting is a total waste of effort. A lot of what i did to theses heads wont have much or any effect. I chose to not blindly hog out the head, as i dont have a flowbench or a clue, i dont want big flow numbers, I dont want to mess up the swirl effects that are already there, i do want to smooth out the major restriction i am convinced that exists in the area of the intake seat i pointed out. Talking with david at wells racing he believes the swirl effect is great for response and economics but not so great for high rpm horsepower. I say thats good for my intentions, as this project is multiporpose and primarily a street machine. My focus is on performance with economy. I dont really enjoy driving a gas hog. I’ve had my fill of that and thats one major point of the 304 project. |
|
|
|
Post by spud on Sept 10, 2022 19:52:25 GMT -8
Well i went down to what was once my machinist today, and rescued my parts from his eternal purgatory and bottleneck for my engine projects. I just walked straight in and started picking up and carrying out my stuff. He asked what i was doing. I said. “ i’m taking my stuff to ben long” he said “well whats he gonna do to them?” I said “ everything you havent in six months” he said “well i didn’t know you were in a hurry!” I said “ i wasn’t, but i was in a far bigger rush than you” he kept saying things about covid and supply chains as i loaded up. I was in ignore mode. My limit had been far exceeded I would say…I didnt rate high enough for even the back burner. All he did in six months was rent my shit out to spiders. Oh well I used this place for 25 years. Dennis wells racing engines. Goodbye Dennis Wells!!! And goodbye david shyster! Dont get run over by the snails. Maybe i can get this head project going again with long racing engines.
|
|
|
|
Post by Captain Awesome on Sept 11, 2022 5:58:38 GMT -8
I'm no Machinst, so I dunno how Cuh-vid is a problem. You're a Machinist, make what you can get fit.
|
|
|
|
Post by spud on Sept 11, 2022 6:45:53 GMT -8
Fuck his excuses. They didnt slow his chevy work down a bit. I bought all the parts already. All he had to do was turn on the serdi machine which had presets for chevy, tools for chevy, in a shop full of chevy everything, install some chevy guides and cut in some chevy seats. Why he chose not to is a bugaboo in his brain. He has done it all before on amc heads for me. How could it go so wrong? Brain problems i guess. Maybe he’s a vaxxed lefty.
|
|
|
|
Post by spud on Sept 21, 2022 23:05:27 GMT -8
Well i guess i’m fuct. So far i’ve heard ok, get in line to wait 6-8 months, or go away with your dorky amc stuff, or sure we never done it but can try that, or ok we can do it, if ya wanna wait six months and then pay 12 or 15 hundred bux… nothing encouraging. What about hacking it myself? I can get bronze guides that thread in, that can size my 3/8 guides down to 11/32, that are broached with a ball bearing to size. That sounds pretty workbench freindly? Then i can buy neway cutters and cut my own seats? Maybe? I’ve never done this but what have i got to lose? I think i can get the neway tools for maybe 1000 bux, and cut my all my own seats from now on. Wtf i’m getting desperate😝 anybody familiar with neway seat cutters? I might have a lot of cutting for a hand operated cutter, but you can use a drill for the heavy work. I think i could do this. Not as quick and easy as a machine shop with a ton of equipment. But i have already wasted six months of my life waiting for nothing.
|
|


